Disclaimer
Hi, just letting you know that all products recommended here have been used by me, or are properly researched to ensure they are the best you are getting without bias.
I am also an affiliate for certain Amazon products and this means that some links here are affiliate links. If you purchase an item through any of them, I MAY earn a commission at no extra cost on you.
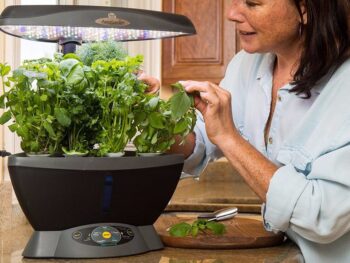
Though the aerogarden is regarded as the most sophisticated and advanced countertop garden the world over, it is equally the easiest to set up, even for beginners who have had no prior contact with it. Knowing how to set it up is a very important prerequisite to starting a successful venture in indoor gardening. Usually, the enclosed user’s guide that comes with each unit shows you almost all you need to know. It also gives you a step-by-step procedure for setting up or fixing your aerogarden without the need for any expert assistance.
But sometimes, you can run into little issues along the line and you might need to perform quick fixes on your own. Issues like a clogged pump, deadlights, something not working as usual, etc. In such a situation, you may find a few helpful tips in the handy user manual. But not everything is covered there and sometimes you may not receive the manual at all! Not to worry, in this post, you will see common issues you might run into while aerogardening and also quick fixes for them which you can try on your own.

What Is A Quick Fix Guide?
A quick fix guide of any kind is a set of instructions on how to get one thing or another done to get your device working properly again. For your aerogarden, it is a set of things you can do to set up or fix little things that may affect your aerogarden at home or anywhere.
You will not always need the help of an expert and so through the use of the necessary information you will find in the quick-fix guide, you will be able to accomplish a lot of fixes promptly.
A quick fix guide may also include some procedures that involve maintenance, cleaning and tending to common problems that may arise in the use of the device.
Why Do You Need Quick Fixes Guide For Your Aerogarden?
You certainly need a quick fix guide for your aerogarden because once you are acquainted with how to set it up and fix little things, little or no time will be wasted for you to get your garden started and running smoothly. In other words, it simply means that your garden can take off immediately after you lay your hands on the unit, and you can also get almost anything fixed when there is a need.
The quick fix guide also allows you to know the components of the unit and how they align together very well. This knowledge will also enable you to dismantle the parts carefully during the cleaning or fixing of the aerogarden.
Additionally, knowing how to couple and uncouple the parts of the aerogarden through the quick fix guide will help you to save the money you would otherwise spend on getting experts to help. You wouldn’t also doubt that knowing the various parts and how they fit together will enable you to identify and equally rectify certain faults or malfunctions when they happen. To crown it all, there is a certain feeling of joy and accomplishment associated with knowing that you fixed your aerogarden all by yourself.
Top Quick Fixes That Comes In Handy In Your Aerogarden Journey
In your aerogarden journey, you may come across one thing or the other that may happen to your unit. The best thing you can do for yourself is to know what to expect with your unit and how you can work things out yourself to ensure you keep using it smoothly. Because of this, here are the most common issues you may face in your aerogarden journey and how to fix them without the help of an expert:
1. How to fix an aerogarden that is not working
When your aerogarden is not working, obviously the most important aim is to get it working properly once again. You cannot do this if you have not identified the fault. Usually, aerogardens can stop working when they are not properly maintained when the power supply line is disrupted or some components are bad. Whatever may be the cause, identify it first and then you can get your garden going once more.
To make things easier, most of these faults can be rectified by you without any expert involvement, but where you need to refer to them, please do not hesitate to do so. After all, you are in it to make gain and certainly not to incur any loss, so get it up and running the best way you know you can.
2. What to do to a clogged aerogarden?
A clogged aerogarden is one which has certain tubes or holes or vents closed or blocked by either plant parts or dirt or any other obstacles. This blockage has many consequences on the performance and efficiency of the device.
Notable among those parts that can get blocked are the pumps, the aerators and the airstone bubblers (for models of aerogardens that have them). To fix any of these, this is what you should do:
- When the airstone bubblers get blocked, give it a scrub using a toothbrush and clean water. Alternatively, you can also soak it in vinegar and scrub afterwards or use hot water to get rid of the obstacle causing the obstruction.
- If the aerator is the part affected by the blockage, simply remove the aerator cap and scrub it along with its housing using a toothbrush and vinegar.
- For blockage in the water pumps, remove the sponge filter and give it a thorough cleaning along with its housing too. This would give way for water to start passing freely. You can also run white vinegar through the pump for a more thorough cleaning. However, when you run vinegar through the pump during cleaning, be sure to run clean water into it afterwards. Thereafter, replace the filters before re-assembling the device.
3. The best fix for aerogarden aerator not working
When the aerogarden aerator is not working either completely or not as effectively, in most cases, it can be attributed to obstruction by debris in its cavity. To get it to function normally will mean that you clean it up and get rid of the obstruction causing the malfunction. If it still fails to work properly even after this, then you may need to get the assistance of a specialist, but in most instances, thorough cleaning does the magic. To clean it, simply remove the aerator cap and scrub it using a toothbrush and vinegar.
4. How to fix an aerogarden that is not bubbling
Not all aerogarden models have airstone bubblers, but for those that do, to get them to bubble once again, there are certain steps to take if they ever develop a fault. The bubblers may cease to bubble when the tubing, airstone or pump are not working. To get it to bubble again, you must clean the airstone. This can be done by giving the airstone a thorough scrubbing with a brush and fresh water. You can also use vinegar or hot water to clean it up. The moment the airstone bubblers begin to work, your aerogarden is back to normal.
5. My aerogarden pump is not working, what next?
Provided there is no interruption to the power supply and all the essential parts are working properly, an aerogarden pump can only stop working when there is obstruction of any kind in its impeller. For this reason, the water pump filters must be given a thorough clean-up regularly during each water change in the aerogarden. You are at liberty to run white vinegar through the pump for proper cleaning. Occasional filter changes are equally advisable to get the pumps to work properly at all times.
When aerogarden buttons are not working, this may be caused by either a disconnection in the power supply line, a fault in the electric board where the buttons are pressed, or worn out and ineffective buttons that can no longer influence the circuit board even when it is fully functional. How you solve any of these is dependent on where the problem lies:
- Where you have any interruption in the power supply route, you can simply restore it to get the buttons working again.
- For faulty boards, trace the source of the fault and resolve them if you can. If you can’t, seek professional help.
- In cases where the buttons are worn out, you may have to replace them entirely with new ones.
The fact is that whenever the buttons fail to work, one or more of the reasons given is almost always the problem. Finding the cause of the fault makes solving the problem quicker and easier.
7. How to unclog the aerogarden sprout
Unclogging an aerogarden sprout involves the removal of dirt or debris that may choke the airstone bubblers. This can easily be done by scrubbing it with fresh water and a toothbrush to get rid of any obstacle along the way. Alternatively, either soaking in vinegar or boiled water can do the trick as well.
8. What to do when my aerogarden has no power
For an aerogarden not to have any power means one or more of several reasons such as interference with the power supply line through either the wires of opposite terminals touching one another or a disconnection somewhere, a blown-out transformer in the gadget or the socket not working. Whatever may be the cause, by the use of a good voltmetre, you are certain to get your aerogarden up and running once again.
When you are certain that the failure of your LED lights to work is not due to any faulty connection or socket and that all other components are in good order, then you should check the in-built transformer to replace it with a suitable adaptor. To do this successfully, make sure that the wires from the adaptor to the LED panel are connected correctly.
9. How to repair an aerogarden LED lights strobing, flashing, flickering or blinking
When your aerogarden LED light is blinking, flashing, flickering or strobing, to get it working normally again, you can try: searching for the 120V AC that goes to the LED panel and take it apart. This will expose the power supply unit (PSU) hidden therein along with three 25V caps that are likely to look bloated or swollen. You should then endeavour to do a complete recap on them with a Panasonic FR. This should be able to stop any blinking or strobing lights.
Where the problem persists even after doing this, you may have to replace the transformer of the device with an appropriate adaptor. In this case, use a multimeter to make sure that the wires from the adaptor and those in the LED panel are correctly joined together in their polarities. These measures are bound to solve any complaints of blinking, flashing, flickering or strobing lights in your aerogarden.
On the other hand, your aerogarden may just need to have the light changed totally if this continues. Visit this post to learn more about our aerogarden lights, changing them and also best light recommendations.
10. The solution to noisy aerogardens
Aerogardens, especially the smaller models can be quite noisy, but in some cases, the noise can be attributed to certain causes which can easily be rectified:
- First, aerogardens can be very noisy when the airstone bubblers are obstructed or blocked. To stop the noise, you just have to rid the device of the obstruction.
- Excessive noise from an aerogarden can also come from an aerator that has suffered neglect. To stop any noise from this cause, you may have to regularly maintain and clean the aerogarden according to the instructions in the user manual.
- And then, it is common for aerogardens to become quite noisy when dirt, plant parts or other debris get into the impellers. You can also stop this by cleaning it to get rid of the blockage.
- At other times, the pump filter may be the reason for the noise. For this, just try to clean or change the pump filter where necessary. Thereafter, your aerogarden should go quiet as usual.
11. How to fix the aerogarden touch screen that is not working
For some reason, the aerogarden touch screen may fail to work and go blank. In this case, the first thing to do is to power cycle it. To power cycle, an aerogarden is to completely disconnect it from the power source so that it can reboot. In some instances, all that may be required to get your aerogarden touch screen functioning again is to reset the timer. Where all these measures fail, which is not very common, you may have to replace the touch screen entirely.
12. What to do when your harvest lights are not working
When your harvest lights are not working, you should first check to make sure that all the connections are intact and that power supplies actually get to the lights. If you are satisfied up to this stage, then check the status of the transformer. If everything turns out well here, then it could be that your LED lights have burst capacitors and for you to get them working again, these capacitors must be replaced. LED lights use very low voltages to work fully. They are rated from about 1.5Volts and this means that they are prone to damage when connected to higher voltage supplies. To protect them from this harm, capacitors must be used that will protect them.
13. How do I fix my aerogarden pump?
To fix your aerogarden pump, you must first ensure that its power supply is intact and that everything is working well. If they are not, then see that the malfunction is solved. If on the other hand neither the power supply nor any part has a problem, you are advised to check for possible blockage within its cavities. In the event of any blockage, clean the pump to remove it and your aerogarden will be fine. If all these efforts fail and the problem is not from a blockage or failed power supply, then you may consider getting new pumps. Fixing it may not take too much effort as the process is self-explanatory and sometimes comes with the replacement pump you will buy. But if you are sceptical about it, refer the repairs to qualified personnel.
Two Best Aerogarden Replacement Pumps
If you are considering changing your aerogarden pumps yourself, you may need to get the best pumps. You do not want one that would cost you money and still require a change after a short while. There are all sorts of replacement pumps on the market, but you need to go for the best. I have done the research and picked two of the best models you can choose from that are common and used by many aerogardeners:
1. Miracle-Gro Aerogarden Replacement Pump for Model No. 100623

Features
- The pump is sold under very customer-friendly terms of warranty and guarantee agreements.
- Crafted from strong materials confers excellent durability on the product.
- With its design and features, it is easy to control and use.
- Makes little or no noise at all while working which makes it adorable for indoor uses.
- This pump works only on aerogarden models where the pump sits inside a large grow-deck tower that extends to the base.
- The common models that use this pump are the AeroGarden 7, Extra, Deluxe, Pro100, & Pro200.
- This replacement pump model is No.100623
- The replacement pump comes with complete step-by-step instructions to replace the pump.
- The item dimensions are 3 x 2 x 2 inches L x W x H and the item weight is 0.1 Pounds.
- Its power source is corded-electric
- Before buying though, check the connector and/or model number on your current pump to be sure this is the right pump for your Aerogarden.
You can click this link to see more about it and purchase it on Amazon for your aerogarden.
2. AeroGarden 971151-0100 Replacement Pump, Model # 200623

Features
- Designed for ease of replacement and takes just minutes to install.
- Oxygenates and distributes nutrient solution in aerogardens for fast, healthy plant growth
- This pump will work with the new Miracle-Grow Ultra, Ultra LED, Extra, Extra LED, Bounty and Harvest.
- The replacement pump comes with complete step-by-step instructions to replace the pump
- This is an O.E.M. (original equipment manufacturer) part.
- The item dimensions are 3 x 2 x 2 inches L x W x H and the item weight is 0.1 Pounds.
- Its power source is corded-electric
- Before buying though, check the connector and/or model number on your current pump to be sure this is the right pump for your Aerogarden.
Simply click this link to see more about this replacement pump and also purchase it on Amazon for your aerogarden.
Best way to do aerogarden troubleshooting
Troubleshooting involves ways and means by which you can solve most of the problems that may arise in your aerogarden. These are problems that may involve the pumps, aerators, the touch screen, airstone bubblers and generally every part of the machine. Using the above quick fixes shared, you can easily get to know what is wrong with your aerogarden and how to go about fixing it on your own.
Like if the pumps are not working well or they make too much noise, you know how to fix them. For complaints with the aerators, lights or the panel, you already know what to do.
Conclusion
The list may not be exhaustive, but the quick fixes mentioned can go a long way in making your aerogardening a smooth one. No doubt the ability to fix, set and maintain the aerogarden is what makes the whole venture attractive and fun to nurture. There is nothing to beat the feeling that you own it and you can be responsible for it in any way. Study this post diligently and you will be glad you did, especially if you have it in mind to go into aerogardening full-time.
You can also check out these AeroGarden product guides if you ever feel lost somewhere.