Disclaimer
Hi, just letting you know that all products recommended here have been used by me, or are properly researched to ensure they are the best you are getting without bias.
I am also an affiliate for certain Amazon products and this means that some links here are affiliate links. If you purchase an item through any of them, I MAY earn a commission at no extra cost on you.
Aerogarden is a simple and modern means of growing a variety of plants indoors and at ease without the restrictions that would otherwise be placed on gardening, either by seasons, rains or availability of sunlight and so on. To derive maximum benefit from this process of growing plants indoors, certain plant hacks or tips are highly advisable and necessary for you to know. In this post, I am going to be sharing with you very useful aerogarden plant hacks that would come in very handy for you while planting.

Why you need to know some aerogarden plant hacks
It is good to know some basic aerogarden plant hacks as they can come in handy always. They can help to increase the yield of the crops, make them grow faster, nurture as many of them as possible and limit the effects of any plant diseases that may temper their development.
Furthermore, there is the issue of how to get the best out of your aerogarden units. This is with regards to their control, proper use for best results as well as their maintenance and cleaning. Knowing how to go about all these, you might need some useful hacks or tips to make your indoor plant growth worth the effort.
General Aerogarden Plant Hacks You Need To Know
Plant hacks are tips, and tricks that always come in useful. Here are some general and important aerogarden plant hacks and tips that would definitely come in handy in your aerogarden journey. I will group them into categories and talk about them one after the other so you can always skip to the category you mostly need help with:
Categories of useful aerogarden plant hacks
- Pruning/trimming plant hacks
- Harvesting plant hacks
- Plant Grow Lights hacks
- Plant care and maintenance hacks
- Aerogarden sponge hacks
- Aerogarden plant seed hacks
- Transplanting hacks
- Cleaning hacks
- Plant root hacks
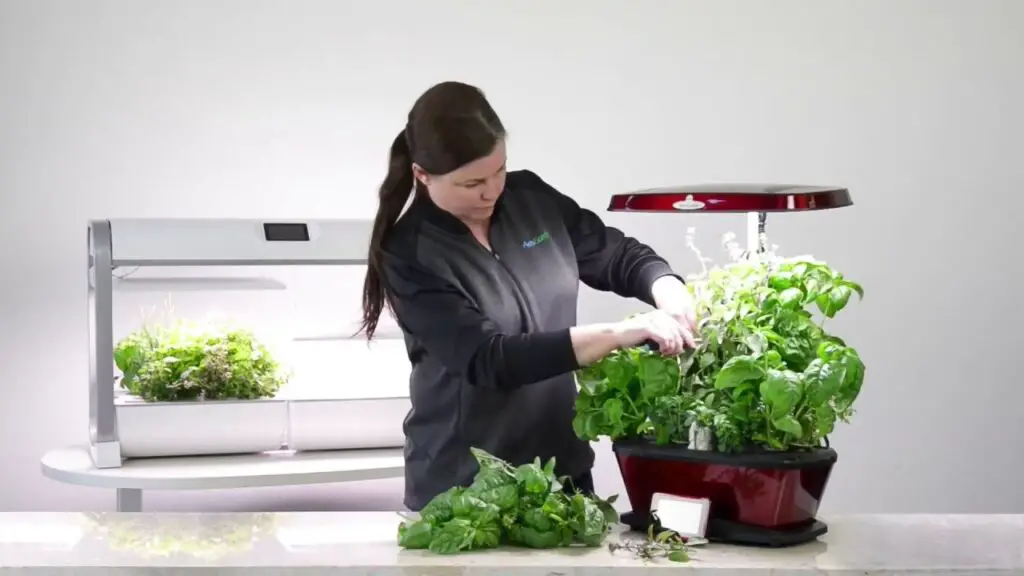
1. Pruning/trimming plant hacks
Pruning plants for some aerogardeners has never come in easy. Some do not know when to prune their aerogarden plants, some cannot tell what to prune and what to leave, and some do not even know how to go about doing it. Let me show you the major things about pruning your plants you need to know.
-
What to do when some aerogarden plants grow faster than others that are all planted at the same time
Where some plants grow faster than others, their arrangements should be such that the shorter ones are not put at any disadvantage. This can be done by placing the plants you know would grow taller at the back, the medium ones in the middle and the shortest ones in front. In this arrangement, none of the plants will be obstructed by any source of Grow Light and consequently, the shorter plants are expected to catch up with the taller ones. However, if you know that the tallest plants would keep growing very fast, they can be pruned to give the smallest ones a chance to also thrive which is important.
-
What to do when your aerogarden plants are getting very crowded
Whenever your aerogarden plants are getting very crowded, either of two things is bound to happen; the plants will refuse to grow any further as they can’t find the necessary space (and light) to do so, or the bigger ones may start preventing smaller plants from getting enough light that is necessary for their growth.
If you find your plants in this overcrowded condition, you have the option of either pruning the plants or harvesting some of them. In fact, each seed pod should have just one plant growing in it to prevent them from competing for space, light, etc; which can cause them to have stunted growth later.
As you will find, later on, plants should be pruned above new leaves to allow shorter plants access to enough light for photosynthetic functions. Alternatively, you may reduce their concentration or overcrowding by transplanting some of them to another aerogarden or an indoor/outdoor garden system. This will provide more space for fresh air and light which are required for faster growth and improved yield of your plants.
-
How to know when your plants are ready for pruning
It is easy enough to know whenever your plants need pruning. This is because while some plants have grown tremendously, especially fast-growing plants like basil, others are still much shorter comparatively. When this disparity in growth happens, there is the need to prune the bigger plants to stimulate the growth of slower plants. In this situation, there is the temptation to raise the lights to satisfy these fast growers, but you are advised to resist such temptation. Instead, prune these tall plants, especially those parts that prevent other shorter plants from getting enough light. This will stimulate the shorter plants to also grow faster. By pruning early and regularly, you are likely to enjoy a much more bumper harvest eventually.
You can also prune or trim back your plants when too many shoots are coming out of the seeds you placed in one spot. For instance, if you place some seeds in a sponge in one Grow Basket, and then you realize that so many of them are growing in one spot, you might want to trim back some of them to prevent them from competition for space, air, light, nutrients and all that.
Additionally, a proper bushy garden looks a lot better than that which contains one giant or overgrown plant that has outgrown others in its neighbourhood. Pruning also releases an appealing scent from the plants. So, please, prune as at when due and regularly too for your benefit and that of the plants.
-
Why you should trim back aerogarden plants
Trimming aerogarden plants includes reducing the sizes of plants from below upwards by removing mainly variegated, dried and blighted leaves which can affect the growth of the plant or obstruct the availability of light to shorter plants. Care must, however, be taken to ensure that while trimming, you do not remove more than one-third of the plant which can be injurious to the plant if done. Removing these dried-up and dead leaves further improves the aeration of the plants and their overall growth and yield.
-
How to effectively prune your overcrowded aerogarden plants in steps
When you have finally decided to prune your plants, have it in mind that the process is simple and shouldn’t make you afraid. Here are easy steps you can follow to get your plants pruned to perfection:
Step 1
In the first step, you are required to identify the presence of those plants that have outgrown or over-shadowed other smaller plants around them. Try to make sure that they are truly obstructing the source of light for other plants.
Step 2
At this stage, you are required to prune tall plants at a position just above a new set of leaves and not below it. You can do this with your fingers if you are very good at it or a pruning tool that would make it neater and faster.
Step 3
After pruning, make sure that you check to ascertain whether the plants need either water or nutrients. If they do, ensure that they are provided immediately after pruning.
Step 4
The excess plants you remove shouldn’t be thrown away as they can go right into the plate or pot and make you a healthy meal you would love.
See a useful, simple, less than 1-minute video of how you can prune your plants without stress.
2. Harvesting plant hacks
Nothing beats the excitement of watching your plant grow and reach the time for harvest. You surely can’t wait to reap the fruits of your labour and of course, the rewards are usually great. As long as your plants grew out of their pods n=and you did the right thing all through the growth period, be sure that your aerogarden would give you enough harvest to enjoy. Here are a few harvest hacks that you should know though.
-
How to know when your plants are ready for harvesting
The simple answer to knowing when to harvest your plants is doing that right when they look edible enough. By this, I mean when they are mature enough to be placed in a plant for eating. You really do not have to wait for your aerogarden to have a forest-like look before you harvest the plants (this is also not a bad idea if that’s what you want though).
Most gardeners are hesitant to harvest their plants on the go, but surprisingly, frequent harvests enable the plants to produce for longer periods than would have been the case. So, you might want to consider harvesting when you see your leaves looking like what you get in stores.
If you do want to wait until it is ‘full harvest time’ then that’s okay. You can go ahead and wait but start to harvest when the majority of plants are fully grown and the stalks are almost completely covered with foliage. At this stage, your aerogarden plants really need harvesting to avoid allowing them to die off. You also need to harvest to allow for more growth and development.
-
Simple harvest tips for your aerogarden plants
From the first month onwards, most plants can be harvested but greater harvests are usually made when the plants are matured. To protect the plant during harvesting, do not harvest more than one-third of the plant at a time. Furthermore, for salad greens, you are advised to cut off only the top two inches of the entire garden or to also harvest large leaves by cutting them off at the base of the plant.
-
What to do when you have an excess harvest of aerogarden plants
Of course, there are times when your aerogarden plants would grow so much that you would have a very bumper yield when it is time for harvest. When you happen to have any excess harvest which you do not need immediately, you have the options of:
– giving out some to friends or loved ones
– selling them off to those who may need them at the moment.
– storing the excess harvest in a refrigerator or freezer for later use.
– using a handy food dehydrating machine to dry and pack them for the future without fear of them spoiling.
– in the extreme, you have the option of transplanting the excess to an outdoor garden to grow as tall and wide as they want.
3. Plant Grow Lights hacks
Grow Lights for your aerogarden plants are as important as the water you provide for them. If anything goes wrong with your light at any minute, your plants may suffer from it, Here are some Grow Lights hack for the plants you might want to keep in mind:
-
How to know when your aerogarden plant lights need to be raised
When most of the plants in your aerogarden have grown a little beyond the level where they are likely to enjoy the best illumination, it is time to raise your aerogarden lights. However, be sure that most of the plants have grown above the position of the light and not just one or a few. This is because if you raise the light to satisfy just a few plants, the shorter ones may suffer reduced illumination with its attendant negative consequences.
Instead of raising the lights for a few that has grown tall, consider trimming them back a little to allow the smaller ones to enjoy the light too.
-
Why you should always have a spare aerogarden Grow Light
Some aerogarden Grow Lights can disappoint gardeners no doubt. The last thing you want is to wake up one day and realize that your aerogarden lights are no longer working. But you can save your plants from getting stranded when your lights decide to start giving trouble, maybe right in the middle of expecting a harvest! Get yourself an aerogarden Grow Light Panel that you can have at hand when you need to urgently replace yours. Check this post for the best Grow Lights I can recommend you to buy and keep handy for emergencies.
PS I have got a full post talking about All You Need To Know About Aerogarden Grow Light: Q&As, Tips, Fixing & Purchasing. If you want to learn about Aerogarden Grow Lights, you might want to check out the post. You would find very helpful ideas and solutions to common light issues you might face in your aerogarden journey.
4. Plant care and maintenance hacks
If everything in your aerogarden is in place but you do not give your plants the necessary care to maintain them throughout their growth, you might as well not expect any progress with them. Here are a few things to know about caring for and maintaining your aerogarden plants:
-
How to know when your aerogarden plants need more water
Obviously, the worst means of knowing when plants need water is when their leaves start wilting or becoming less turgid. You do not have to wait for your plants to be that way before you give them water. The best means of knowing when your plants need more water in the aerogarden is by checking the water level on the display panel provided on the aerogarden. When the water level is less than the required height, then water is needed by the plant and you should promptly add that.
Also, most modern aerogardens are equipped with an alarm system that alerts you when the plant is either in need of water. But if your aerogarden does not have provision for this and no way of knowing how far down the water level has gone, you can detect whether your plants need water by observing the total absence of moisture in the grow deck from where the plant sprouts. But, I do not recommend this. You should try to observe how long your plants can stay before exhausting the water you have previously put in, then you can use that as an estimate to keep adding more water when it must have run out.
-
How to know when and how your aerogarden plants need plant nutrients
Any good aerogarden unit has several ways by which you can tell when the plant needs anything. For instance, the control panel of most aerogardens have indicators that tell you when the plants need either water or nutrients. This is done by observing the level of water or nutrients available to the plant in comparison to what is regarded as normal daily requirements of the plants.
Also, aerogardens have alert systems that will give you very timely notice the instant the plants need either water or any essential nutrients. This alert can be given through their Wifi facility on your phone, or an alarm system according to the setting you have made. Whichever one happens just know that you will be alerted by your aerogarden to know when your plants need nutrients. If your unit doesn’t have provision for that, then you might need to go over the instructions of the seeds to know the nutrient requirements of each. From there you can calculate when you need to refill the plant nutrients.
For the “How”, your plants need only the required measurement of nutrients as specified in each plant’s guide or instruction from the manufacturers of the plant nutrients.
-
How to remove dead plants from your aerogarden
Whenever you have dead, dried or withered plants, you have to remove them. To remove such plants from your aerogarden, make sure that they are removed so carefully that you do not disturb or damage the roots of the plants close by.
You can also trim the dead plants at the lowest possible positions closest to their roots in such a way that the roots closest to them will not be affected. Refer to the video earlier shared for the simplest way you can safely prune/trim your aerogarden plans. You can use the same way to remove dead ones.
Alternatively, you can remove (totally) dead plants by removing the seed pods or sponges in which they grow. That is if the dead plants were the only ones occupying the seed pod.
-
How to easily remove bugs or other creepy, crawling insects on your aerogarden plants
Bugs and creeping insects of all types may cling to the plants in your aerogarden obstinately. When this happens, there are many ways through which you can approach the issue safely without affecting your plants in any way.
If you want to try a natural approach, mix Garden Vinegar and water in a spray bottle. The best way to reduce the potency of the solution is by making the vinegar and water to be in a ratio of 3:1 respectively. Spray this mix over your plants carefully; it can help keep some of these crawling things away and won’t harm the plant or you later on.
Alternatively, you may opt to prevent the problem by using any safe plant pesticides or insecticide spray that is not injurious to human and plant health in eliminating these insects. I will recommend this Houseplant & Garden Insect Killer as it has got lots of positive feedback from its users.
You can also use insect sticky traps which are usually brightly coloured with glues that will draw in flying insects, trap them and control any infestation. Additionally, you may have to clean off any dead leaves or debris in the aerogarden plants that may harbour these nasty insects or provide them with food or even both.
NB: Click here to see more about the sticky insect traps on Amazon. Click here for Safe Houseplant & Garden Insect Killer on Amazon. You can also click here to learn more about the Garden Vinegar on Amazon.
5. Aerogarden sponge hacks
Aerogarden sponges are must-haves no doubt. Whether the Grow Sponges or Pump Sponges, it would do you a lot of good if you know just how to work your way around them to get the best out of using them. Keep these few sponge tips in mind always:
-
How to know when your aerogarden plant sponges need to be changed
You need to know that the sponges you start your plants with are not going to stay there permanently no matter how good or careful you are with them. There will come a time when you just need to change them, if not for anything, for the fact that they have stayed too long and may pose a health risk for the plants growing in them.
You should change your sponges when the plants are unable to soak up nutrients or water, which is required for their overall development. In most cases, when the rate of water uptake by the plants is reduced or totally prevented, the sponges are the major cause and cleaning the pump sponge and filter may help. Additionally, when the pump sponge is damaged, the aerogarden pump may no longer be quiet but will suddenly become very noisy. When this happens, thorough cleaning of the sponge and its filter may be all that is necessary to resolve the issue permanently. Where that fails to solve the problem, you may have to change the sponges entirely.
Also, when the sponges look bad, has mould growing on them or have started tearing apart; you need not delay in changing them.
-
How to make your own aerogarden sponges
If you do not want to buy aerogarden sponges (for pump or seed), you can always make yours. Making your own aerogarden sponges does not take much more than using any mesh-like absorbent substance which can fit into the aerogarden basket or that can go well with the pump filters. The Grow sponge so created should be able to absorb water and any dissolved minerals in it. The pump sponge should also trap all unwanted substances from getting into the aerogarden pump which will otherwise damage it.
Before you set out to construct your own aerogarden sponge, keep in mind that the source should be from any material that is light, highly absorbent and can fit into the basket and pump filter neatly. The mesh network of the sponge must be small enough to trap all unwanted particles from getting access into the seed and thereby causing it problems.
Once you get a good material that can serve, simply trim the edges to give it a rounded shape that can fit into the aerogarden basket. Also, make sure to cut it into a size small enough to fit well. If you are putting it in the pump, also make sure it is rectangle-shaped and a little flat to fit into the filter.
Make sure that the sponge can be really soaked in enough water to allow for proper seed germination before any seed is placed in it. The seeds you put into the sponges must also be very viable as this is the only way you can guarantee their germination
-
The best way to maintain aerogarden sponges
Aerogarden pump sponges must be cleaned regularly and sanitized too to make sure that they continue to filter out all substances capable of damaging the pump on getting entry into it. For the Grow Sponges, make sure that before you plant any crops after every harvest, the sponges should be cleaned well.
Similarly, the water used in the aerogarden pump must be as clean and clear as possible. This will reduce how much-unwanted substances get into the aerogarden pump which may eventually cause their occlusion and ineffectiveness. And also reduce impurities that might get into Grow Sponges and contaminate the seeds/plants. Distilled pure water is highly recommended for this purpose.
To make sure that the sponges continue to serve efficiently for long periods, make sure that they (along with the entire pump) are cleaned thoroughly the moment the pump begins to make irritating sounds while in operation.
-
The best alternatives to aerogarden sponges
The best possible alternative to sponges is any soft absorbent materials that will allow water to pass through as well as retain essential nutrients needed by the germinating seeds placed in them. These alternatives should fit neatly into their Grow Baskets which can then be covered with Grow Domes to retain very high humidity by placing them in a warm and lighted location. The same kind of alternative goes for sponges you can use for the pump filter.
6. Aerogarden plant seed hacks
Without seeds for your aerogardens, of course, you won’t expect any plants. To get the most out of every seed you buy for your aerogarden, keep these simple hacks in mind.
-
How to plant your aerogarden seeds using the ‘Grow Anything Kit’
The ‘grow anything kit’ is meant for both beginners and those aerogardeners who wish to grow plants of their choice in their aerogardens. If you have your own seeds or can’t get your unit’s seed pods or kits in the market, this can come in handy. The kit can be used on all aerogarden models and it permits you to grow any seeds you want conveniently as you have all you need to grow your seeds.
Using the grow anything kit to get your plants up is quite easy. Since you already got all the supplies you’ll need to grow your favourite plants in the kit, except the seeds, you just need to get your own seeds and you are good. Here is how to use the grow kit to plant your seeds.
– Place the seeds into the middle of the Grow Sponges and put that into the Grow Baskets which you need to place into the spot made for it on your aerogarden unit. if your sponge is already inside the basket, just toss the seeds in there.
– Once that is done, you can add nutrients and water according to the plant’s demands.
– Put on the light according to the specifications and requirements you know about the plant.
– Go ahead and label each plant before covering them with the Grow Dome while you begin your countdown.
-
The best aerogarden seed cover (Grow Dome) alternatives
Aerogarden Grow Domes (or seed covers as they are called) for plants are usually necessary when your plants are just in the seed to tiny plant stage. You need to keep them covered until when they are tall enough to start touching the covers. If for one reason or the other you do not have a Grow Dome, you can still use other alternatives to protect your plant.
The best aerogarden seed cover alternatives should be light, transparent plastics of the same size as regular Grow Domes that can cover the plants securely enough to maintain humidity very high, especially when placed in warm and well-lighted surroundings.
7. Transplanting hacks
If the final destination of your aerogarden plants is outside the aerogarden, then transplanting it is inevitable. You can use t=ypur aerogarden as a seed starter and when they are big enough, you can transplant to another indoor system or an outdoor garden. Here are useful transplanting hacks you might need:
-
How to know when to transplant your aerogarden plants to the outdoor garden
Any plant suitable for transplanting from an aerogarden to an outdoor garden or other indoor garden systems must be very healthy and pure greenish. The plants to be transplanted from the aerogarden must also be seen to have grown a little on the aerogarden if not when transplanted they may affect further growth of the plants.
You can transplant your plants when they have grown too much and overcrowded your aerogarden unit. Transplanting can be done if you feel your aerogarden may be at risk of growing them to maturity; like having pumpkins grow there.
Also, transplanting is imperative when the plants are not thriving very well. Before transplanting from the aerogarden to the outdoors, you must first make sure that the outdoor garden is well supplied with water and sufficient nutrients for proper plant growth when transferred.
-
Simplest ways to transplant aerogarden plants to the outdoors without killing them
The best way to transplant aerogarden plants is to ensure their removal gently with their roots intact. The process of transplanting should be executed without delay to make sure that the plants survive the ordeal of transplanting. Furthermore, the soil on which the transplant is intended must be very rich in essential nutrients and water to support proper growth.
If you are looking at successfully transplanting your plants from an aerogarden to an outdoor garden or indoor garden system, I have listed detailed steps you can achieve this. Simply click this link to be taken to where you can read all about safely transplanting from aerogarden to other places.
8. Cleaning hacks:
Aerogarden requires cleaning once in a while as this is very necessary for obvious health reasons. If you want to prevent your plants from getting contaminated as a result of growing in an unclean aerogarden, keep these things in mind:
-
How to know when your aerogarden is due for a cleaning
You can easily know when the aerogarden is due for cleaning when the pump becomes a little too loud, especially with smaller aerogarden units which are naturally louder than the bigger ones. Secondly, your aerogarden is due for cleaning after every harvest before planting fresh seeds. It is also time to clean your aerogarden where you observe significant litter of dried and dead leaves in the kit.
It’s best if you do not wait for long before cleaning your aerogarden for the sake of growing healthy plants. If possible, have a routine you can use for cleaning. Say, every 2 weeks or once a month or any routine you choose. This can be influenced by how often you use the aerogarden and how many plants you have there at a go.
-
Materials needed for aerogarden cleaning
You do not need much to clean your aerogarden even though cleaning is quite necessary. It is easy to clean an aerogarden but not with a dishwasher because using a dishwasher can damage the plastic parts or the interior may not be washed well leading to bacterial growth that will affect your plants. For any aerogarden cleaning, you will need water, chlorine bleach or vinegar and paper towels. You are at liberty to use either vinegar or chlorine bleach for cleaning, they can serve just fine.
-
Simplest steps to safely clean your aerogarden
You do not need to do much when cleaning your aerogarden. In fact, apart from only using a damp towel to clean around/outside the body, the pump is the most important place. By cleaning the aerogarden properly, its pump should be cleaned and this can be done before every planting to guard against root pathogens and other bacteria from spreading inside your bowl.
Here are simple steps you can follow to safely clean your aerogarden:
Step 1
You must have finished harvesting your plants and are ready to clean them. Ensure you throw away all the old seedpods as well as any plants stuck inside the aerogarden before cleaning. Also, pour out all water left inside the aerogarden.
Step 2
In this stage, if you are using chlorine bleach, mix one-quarter of it with enough water. While with white distilled vinegar, use five cups to a good amount of water. They should be mixed well with water before using it to clean the aerogarden. Afterwards, pour the sanitiser (water/vinegar/chlorine bleach mix) inside the bowl of the aerogarden.
Step 3
This is the step where you turn on your pump for about 2-5 minutes depending on the size of your unit. You need to keep it on long enough for the mix to touch every area of the aerogarden insides.
Step 4
Once satisfied, you can pour the sanitiser out of the bowl without leaving anything behind.
Step 5
Proceed to fill your bowl with clean clear water after the system has been sanitized. This will make sure to clean any possible remnant of sanitiser from the bowl.
Step 6
Turn on the pump once again just like you did previously for about 2-5 minutes too. Ensure to use clean water here which will serve to clear out any remaining sanitiser as well as clean the interior of the pump too. This step is particularly important if you happen to have used chlorine bleach in your cleaning.
Step 7
Empty the bowl of the aerogarden once again. Since it is likely going to contain some sanitiser in it, repeat steps 5 and 6 one or two more times to ensure that there’s no cleaning agent left.
Step 8
Use the paper towels to pat the aerogarden dry. You can still choose to air dry it without using towels.
Step 9
Finally, allow the aerogarden to dry in about two days, preferably out in the open.
9. Plant root hacks
Your aerogarden plants do not grow on air and so providing the best care for their roots would definitely go a long way. See some important root hacks you might want to know:
-
What to do if your aerogarden plant roots are tangled
The roots of some plants that grow to tremendous heights like tomatoes are most likely found to get entangled with the roots of other plants in the aerogarden units. This is because tomatoes and other plants like it are quite capable of outgrowing any container that is not spacious enough to accommodate them and thus trimming in the case of entangled roots become imperative. Dills too can grow wild and become a massive tangle that gets into anything if there is no occasional trimming back.
However, this is a very delicate issue since, in the process of relieving this entanglement, you may end up damaging the plant due to ripping off the roots from the plant. To prevent this nasty possibility, you will do well to consider keeping the roots out of the water pump or alternatively use a knee-high hose that is tied around the water pump. These knee-high pumps are available at very friendly prices in most drug stores and they go a long way to reduce the chances of plant roots getting entangled.
-
How to prevent plant roots from rotting away
Plant roots rarely rot without very good reasons and some of the commonest reasons for this can be either insufficient water getting to the roots usually due to faulty aerogarden pumps, the plants not getting enough essential requirements for their growth and strength or when the aerogarden unit is contaminated with plant pathogens, particularly bacteria and fungi.
Whatever may be the cause, there are very reliable techniques to resolve the issue. First and most importantly, always make sure that the aerogarden is regularly cleaned and sanitized to rid it of injurious pathogens. Also, make sure that the aerogarden pump is working properly and you can always tell when it is working if the plants alert you of the need for water at normal intervals according to your user manual. In other words, when the pump is functioning efficiently, the aerogarden does not alert you for water addition regularly as it should under normal circumstances.
There are also instances where safe fungicides can be applied to prevent root destruction by moulds or a capful of hydrogen peroxide to help with the root rot should you encounter any. But this should be done with strict obedience to the manufacturers’ instructions which are contained in the user manual. When this care is not taken, you risk harming the plants while applying the fungicide or other antibiotics.
-
When and how to trim the roots of your aerogarden plants
You really do not need to wait for your plant roots to begin to fill their container and get so entangled with others that you start thinking of root trimming. Start trimming your roots from the get-go as it can be a hassle if they start growing too long and tangling up in the water. You can start trimming in very small amounts and check up on them days later to see if the plants are doing well. If they are good, you can leave them and come back after like a week to see if the roots are getting too long again.
The how?
Root trimming must be approached with great care because if it is not done carefully, it can pose serious dangers to the plants. If you must trim, make sure that the plants and all other plants in the vicinity would be as unaffected as possible. You can ensure that the roots are trimmed as carefully as possible in such a way that their intake of water and nutrients is not impeded in any way. And you have to do that with clean hands and tools to avoid introducing bacteria.
To safely trim the roots of your aerogarden plants:
- First, remove the reservoir if yours is at the base of the Aerogarde.
- Disconnect the pump to avoid spoiling anything. in the process.
- Pull out the whole tray of plants i.e the Grow Deck (as shown in the previous image) and place it on a flat, clean tray or surface; or you can just have someone hold it up for you. The roots are usually drippy and can be messy so if you can do this over a sink, it would be great.
- If the roots are very long and entangled, carefully comb the bottom part of the roots in a combing-like motion. Trim away the extra roots hanging long and cut any excess you might find sticking out.
- If it is super bushy and looks like it poses a risk to running your unit, you can go ahead and hack off 1/3 of the root mass. Be careful not to take out too many that would shock the plant.
- Watch out for the filter that covers the pump though, they can be stuck on the roots and you could throw them away unknowingly.
- You can use the opportunity to change the water before placing the plants back in. Simply pour out the water to do a full change and add a clean one back in.
- Go ahead and set everything back in place before turning it back on.
Be sure to use a clean pair of snippers for cutting or trimming the roots as dirty tools can also introduce root rot. Do not trim more than one-third of the entire roots of the plant as doing so poses a great danger to the plants and their survival.
NB: NEVER prune the leaves and roots of your plants within the same period to avoid causing your plants to struggle for survival.
-
How to manage aerogarden root mould
The first and most effective means of managing root mould is by way of regularly cleaning and sanitizing your aerogarden unit using water and vinegar. This has the effect of ridding your aerogarden of plant moulds. You can also manage root mould by carefully applying safe fungicides that will eliminate them from the plants entirely.
-
When and how to attempt aerogarden root cleaning
The best time to clean your aerogarden plant roots is when they show rapid and healthy growth by way of producing dark greenish foliage without any blighting. At this stage, clean roots absorb sufficient water containing essential nutrients that will facilitate more growth that promises a bumper harvest.
On the issue of root cleaning, your best bet is to make sure that your aerogarden pump is working effectively. This will ensure that your plant roots are always free of any debris and plant pathogens.
-
How best to protect your plant roots
You can efficiently protect your plant roots by making sure that they are adequately provided with water and all essential plant nutrients which will prevent them from rotting away and also ensure maximum absorption of water.
You will also do well in protecting them by making sure that the aerogarden is always free from bacteria and all plant pathogens through regular and thorough cleaning and use of clean water always.
How to save money on your aerogarden maintenance (light, sponges, seed pods, etc).
Just like every other garden venture, aerogarden can be a little bit expensive to maintain even though the return on investment can be way more than the expenses. It is still important that you see how you can cut down on expenses that are not all that necessary or even try to do things that are less expensive but would still give you the same results. Let me share some of these aerogarden money-saving plant hacks with you:
- It is known that LED bulbs, unlike other conventional bulbs, are very cost-effective since they use much less power to operate. This is all the more important considering that aerogarden lights are used for an average of at least sixteen hours every day. Best to invest in this type of light if you ever need to buy a Grow Light separately.
- In the case of the sponges of any aerogarden kit, they should be cleaned regularly during every planting session or at least once in two weeks with clear clean water and chlorine bleach or alcohol. This will prolong their shelf lives and save you the cost of replacing them very often. Just make sure that the sponges are cleaned so well that no trace of bleach or vinegar is left in them.
- Keep in mind that seed pods can be re-used if maintained well and you also have the option of making your own seed pods.
- Instead of buying all your supplies separately, buy them in sets as they are cheaper. For instance, a Grow Anything Kit contains baskets, sponges, domes, labels and plant nutrients. The price is way lesser than when you choose to buy everything separately.
All these and more will help you to cut down on the overall costs of aerogarden maintenance. If you can, always make research on the prices of things you want to buy to know where you can get them cheaper and see if you can find alternatives that would still give you the same results and cost lesser.

Conclusion
I guess I have said almost all you need to know for the smooth running of your aerogarden and better plant yields leading to bumper harvests. What is now left is the proper application of whatever knowledge is gleaned here for successful aerogardening you will enjoy.
Feel free to comment below with your thoughts, questions and other helpful hacks you might know.

Pingback: How To Get Any Aerogarden Model Clean And Ready For Use
Pingback: The Best Solutions To 21 Aerogarden Plant Problems You Might Encounter
Pingback: Helpful Aerogarden Tips To Keep In Mind - Aerogarden Info